Authentication has always been a pain point. Either you spend weeks building a robust auth system, or you piece together various services that don’t quite fit. That’s why I was excited to discover how well Astro and Clerk work together.
Why Astro?
Astro’s content-focused approach means I can build fast, SEO-friendly sites without shipping unnecessary JavaScript. It’s perfect for my personal site (trevorlasn.com) because it delivers exactly what I need: fast load times and seamless content management.
What really sold me on Astro was its “islands architecture”; I can write most of my site in static HTML and sprinkle in interactivity only where needed. This means my authentication UI can be dynamic while keeping the rest of the site lightweight.
Astro’s “islands” of interactivity give me the best of both worlds: the speed of static HTML with the power of React when I actually need it.
Why Clerk?
Authentication is complex. You need to handle sessions, manage tokens, deal with OAuth providers, implement 2FA, and much more. Clerk handles all of this out of the box, and their free tier is generous - 10,000 monthly active users is more than enough for most projects.
The integration with Astro is surprisingly straightforward. A few lines of code, and you have a complete auth system.
Getting Started
First, start an Astro project from scratch. If you want to see the code first, you can find it here
npm create astro@latestNext, install Clerk.
npm install @clerk/astroFinally, add Clerk to your Astro project.
import { defineConfig } from 'astro/config'import node from '@astrojs/node'import clerk from '@clerk/astro'
export default defineConfig({ integrations: [clerk()], adapter: node({ mode: 'standalone' }), output: 'server',})Set your Clerk API keys. You can find these in your Clerk dashboard.
PUBLIC_CLERK_PUBLISHABLE_KEY=****************************************CLERK_SECRET_KEY=****************************************Middleware is required to protect your routes. Add the following to your middleware.ts file.
import { clerkMiddleware, createRouteMatcher } from "@clerk/astro/server";
const isProtectedRoute = createRouteMatcher(['/dashboard(.*)', ''])
export const onRequest = clerkMiddleware((auth, context) => { const { redirectToSignIn, userId } = auth()
if (!userId && isProtectedRoute(context.request)) {
return redirectToSignIn() }})You can customize the routes Clerk protects by modifying the createRouteMatcher array. For this example, Clerk will protect the /dashboard route.
That’s all that’s needed to setup the functionality. Next, let’s add the UI components.
Clerk provides SignedOut, SignedIn, SignInButton and UserButton components. These components make it easy to build a custom authentication UI.
---import { SignedIn, SignedOut, UserButton, SignInButton } from "@clerk/astro/components";---<nav> <SignedOut> <SignInButton mode="modal" /> </SignedOut> <SignedIn> <UserButton /> </SignedIn></nav>- SignedIn: Children of this component can only be seen while signed in.
- SignedOut: Children of this component can only be seen while signed out.
- UserButton: Shows the signed-in user’s avatar. Selecting it opens a dropdown menu with account management options.
- SignInButton: An unstyled component that links to the sign-in page.
Start by creating a route that will be accessible to all users.
---import Layout from '../components/Layout.astro'---
<Layout title="Astro 5 + Clerk Demo"> <h1 class="text-2xl font-bold text-white">Sign in to try it out</h1></Layout>Next, let’s create a protected route. This route will only be accessible to signed-in users. Remember, we protected the /dashboard route in the middleware.ts file.
---import Layout from '../components/Layout.astro'---
<Layout title="Astro 5 + Clerk"> <h1>Dashboard</h1> <p> Protected route. Only logged in users can see this page. </p></Layout>Finally, we can test our setup. Run the following command to start the Astro server.
npm run dev┃ Local http://localhost:4321/┃ Network use --host to expose
17:36:43 watching for file changes...'/'should display the sign-in button.

Clicking the sign-in button should open the Clerk modal.

After signing in, you should see the signed in view. The sign-in button should be replaced with the user profile image.

- If everything went smoothly, the
'/dashboard'route should be accessible only to signed-in users. Otherwise, you’ll be redirected to the sign-in page.

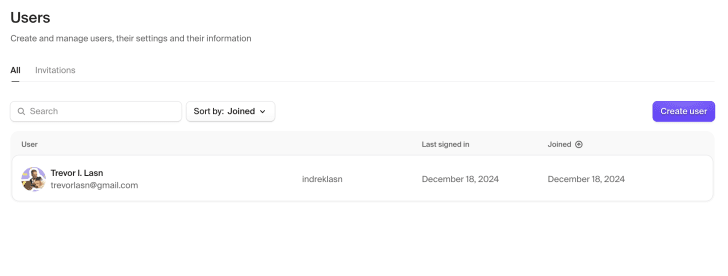
When we head to the Clerk dashboard, we can see the user we just created.
That’s it! You now have a fully functional authentication system in your Astro project. You can customize the UI, add 2FA, and much more. Clerk’s documentation is excellent, so you’ll have no trouble getting started.
- See full code here: https://github.com/indreklasn/astro-5-clerk-auth (make sure you add the
.envfile with your Clerk API keys)